Monday, December 3, 2012

No Crease Hair Ties


These sweet little hair ties popped up a few years ago on places like Birchbox.com and in Sephora. Half way between an elastic band and a ribbon I obviously fell in love- practical AND adorable. The best part is they don't crease or pull your hair and they look cute stacked on your wrist! Now I'm seeing these little guys everywhere in all different colors and patterns but one thing is always the same- they're WAY overpriced. I was accustomed to paying upwards of 6$ for 3 ties.

these really awesome tie-dye ones are from Twistband  (www.thetwistband.com)


Anyone who knows me knows I get obsessive about collecting things (remember silly bands? that was bad) so a few of these ties wouldn't do- I wanted every color possible!! Easiest way to get tons of colors and styles for REALLY cheap? Make them yourself!

You Need:
-Soft 'Fold Over' Elastic- I ordered mine from www.sunshineshoppesupply.com for about 50 cents a yard (a yard makes 4-5 ties)

-scissors

-a ruler

Optional Gifting Supplies:

-Metal ball chain keychains (try etsy.com)
-Paper tags
-Decorative charms, bows, stamps, markers etc.


Step One:
-Measure your wrist around using the elastic and add 2" (ex: My wrist is 7" around so I cut my elastic at 9") You want the ties to fit comfortably on your wrist.
-If you're making the ties as gifts a safe measurement is about 10- 11" total.
-If you don't care that much about precision- just fold a yard long piece in half once and then in half again and cut at the folds- this will give you 4 ties per yard.


Step Two:
-Fold Piece in half (make sure the shiny side is facing outwards), grab the two ends, and tie a knot leaving two little end tails.
-Try the elastic on your wrist. If it is really tight and small, re-tie closer to the end (resulting in smaller tails)
-Trim tails to get rid of fraying edges


Voila! Tons of hair ties for a miniscule percent of the cost!


Step Three:
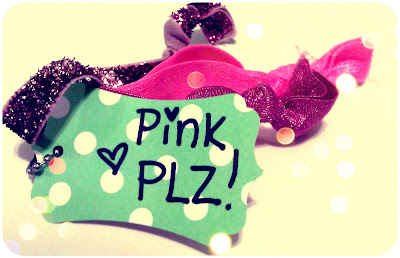
-To make an adorable gift, gather them in groups of themed colors, put them on a metal ball chain (try Etsy for really cheap ones in bulk), and make an adorable gift tag!


Here are some that I made to send out for the holidays & birthdays! Such a cute little "I'm thinking of you" gift for a friend or relative


Monday, November 12, 2012

Starry-Eyed Skull Bracelet


I fell in love with my first skull bracelet about a year ago after finding it in a weird little shop on vacation.. there's just something creepy-adorable about the little beads. Sadly, the elastic snapped to my skull bracelet and I lost half the beads. Instead of trying to find another one I decided to just make my own! On top of that, I wanted to make a more girly-glam version of the bracelet, thus the starry-eyed skull was born!

Supplies:
-Skull beads - They come in all different sizes, shapes, and colors. Try Etsy.com (just search skull beads and pick which you like best!) You can also find them at many craft stores.
-Jewelry elastic
-Glitter nail polish
-Ribbon (optional)
-Hot Glue Gun + Glue (optional)


Step One:
-String the skulls onto the Jewelry elastic. Measure to fit your wrist (with my size wrist/ beads I used 15 skulls)
-Tie string in a secure knot.

pink, red, and turquoise! 

Step Two:
-Lay bracelet flat. Face all skulls upwards
-Using glitter nail polish carefully dab each skull eye socket. The polish should fill the hollow socket. I found using a medium sized glitter gave me the look I wanted. You can see below the different between using a fine glitter and a medium. It's totally your preference!


 fine glitter vs. medium glitter
(tip: if you mess up or don't like the polish you've chosen use a cotton swab to remove the paint!)


for the pink skull bracelet I only painted every other skull


Step Three:
-Let polish dry completely (this could take a while)
-Optionally decorate with a ribbon bow. Use a little dab of hot glue to secure the bow so that it does not untie.


Voila! Spooky-Glam skull bracelets you can stack :)


I love chunky stacked bracelets


.. maybe a little too much :)


The Morning Doodle 3


for todays morning doodle (made possible by Instagram) we've got another cat (typical), a 'Voticorn' inspired by the recent election and a wholeeeee lot of Disney-inspired fluff. Ugh, how I love a good princess! Oh and lots of girls with tattoos too. Disney & tattoos. 


Wednesday, October 31, 2012

Craft Obsession: Halloween!


There's nothing quite like Halloween- costumes, fall, pumpkins, and lots and lots of candy. So to celebrate my favorite holiday I'm bringing you a craft obsession post that is strictly Halloween themed!!

A really easy and simple way to make DIY decorations is just to buy wooden bases at your local craft store. I purchased these adorable coffin boxes for my niece and nephew, a "Happy Halloween" wooden cut out, and a hanging pumpkin! All from Michaels!
We all know my favorite craft paint is Martha Stewart's so I stocked up on some great halloween colors!
(when you open the coffin boxes they scream "Muahahaha"- I know, awesome)

(First time trying pearlescent paint- awesome)


The coffins I layered with the Martha Stewart Paint- as always, make sure you the boxes stay open until the paint dries so that they aren't sealed such (it got a little annoying- the boxes wouldn't stop making spooky sounds). 
I used White Tulip Puffy paint to make the slightly dimensional skeletons and FolkArt glow-in-the dark paint to outline some of the details. 


For the "Happy Halloween" sign I just used an array of paints and patterns!


Finally, I covered the hanging pumpkin in scrapbook paper using Mod-Podge and painted on a cute little pumpkin face! 


And everyone's favorite Halloween craft: pumpkins! Although this year I opted for painting instead of carving- and made it "Happy Autumn" so I could keep it out all season!


And here are some of my favorite Halloween pictures- brought to you by instagram :)
HAPPY HALLOWEEN EVERYONE!!!!


 I just love dogs in costumes...

^Buddy
and Samson Puppington. 

Some of my favorite Halloween (and just because) Costumes...

 Ginny Weasley (Samson Puppington went as Sirius Black):

 Zombie Apocalypse:


  3 Blind Mice:


 Special Edition Pink Cinderella (I was that cool) & a 50s waitress:


Raggedy Ann: 


  Scarlet O'Hara:


Power Rangers:


Ke$ha & Miley Cyrus:


Beanie Babies (I was the deer):


 HAPPY HALLOWEEN!!!!!!