Showing posts with label holiday. Show all posts

Wednesday, December 4, 2013

The Moxie Fox


Hello everyone!
It's been a while since I've posted on here! I apologize, today's post isn't a tutorial- but I wanted to tell you all about my new crafting obsession- BOWS. Now I know it's nothing new, everyone loves a good bow, but I've made so many hair bows lately that I decided to open up an Etsy Shop! You can find it here: www.etsy.com/shop/TheMoxieFox
Right now it's packed full of holiday bows as well as some jewelry and hair ties! So check it out if you have some spare time and I PROMISE I'll be posting some good DIY tutorials soon! Happy Holidays!!

Here are some of the bows available in my shop:


Friday, March 15, 2013

The Great Big St. Patty's Day Post


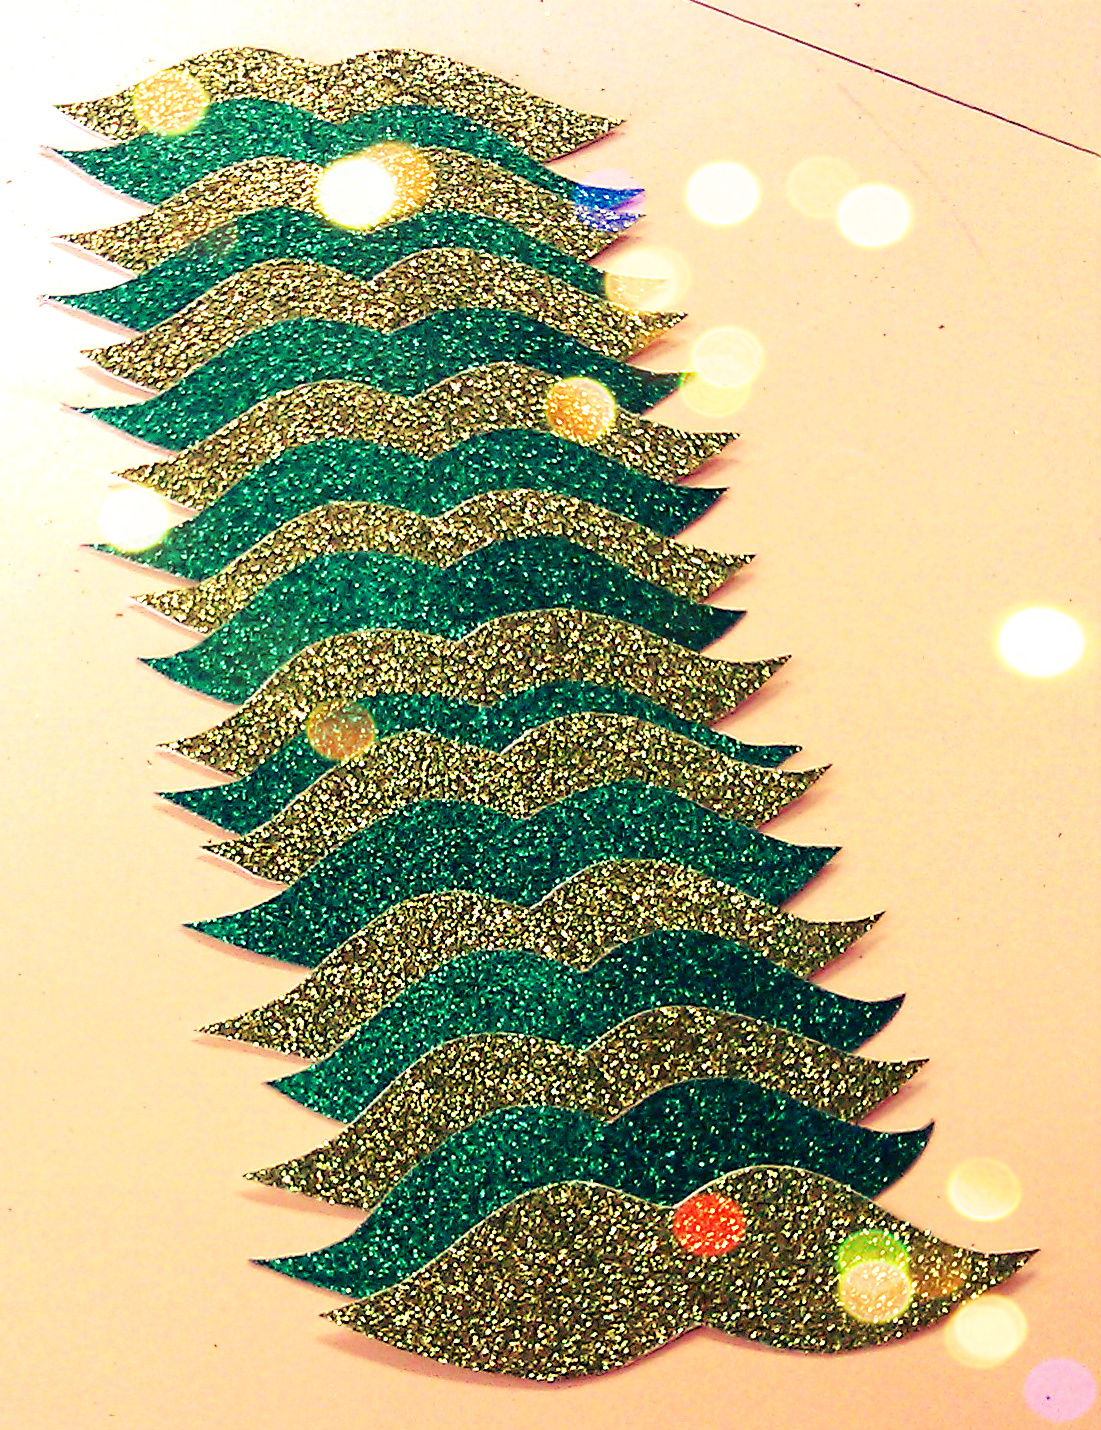
Well, it's March- the month where everyone is Irish. Give me green, glitter, and Shamrock Shakes! Celebrate in hipster style with these adorable mustache straws :)


 Supplies: 
-Sheets of glitter paper (I got one in light green and one in dark green)
-Scissors
-Standard Hole Punch
-Straws that bend
-Pencil/ pen

 Step One: On the back side of the glitter paper draw a mustache. The easiest way to do this is to draw two circles right next to each other. Then draw triangles on either side of the circles and add a curly shape to each end. You can also just print one out from clipart, cut it out and use it as a stencil.


 Step Two: Cut out your mustache and trace it however many times you would like on the back of the glitter paper. Cut out all of your mustaches.


 Step Three: Punch a hole in the center of your mustache. Place each mustache on a straw with the glitter side facing away from the end you drink from. Now you can be a super-hip glittery leprechaun every time you sip your Guinness on St. Patty's Day :D


 I also prepared a few other crafts for the holiday. I made this floral headband using paper flowers I picked up from the scrapbook section at Michael's and soft elastic (left over from making no-crease hair ties). I sewed the flowers in color gradation along the front of the headband. Make sure if you're using paper flowers that you really securely sew them to the headband. The paper rips easily.
 It's comfy, cute, and reminds me of Spring (which I need, since it's snowing in Pittsburgh right now). 


Some Ombre St. Patty's Day nails I did using a make-up sponge & gold glitter!


And of course it wouldn't be a holiday without decorated bowling pins! :)


And here's the sweater I'm wearing (kind of a mixture between my hunger games tee and rib cage sweater) Shamrock elbow patches! :)


Wednesday, January 9, 2013

Christmas Peppermint Tie Dye Cupcakes


Your favorite Tie Dye Cupcake with a holiday twist!

Ingredients:
-Your favorite vanilla cake mix (white cake works too.. but it's a little to light & airy of a cake to handle the dye well... the texture came out a little off where there was no difference when using vanilla cake mix)
-Whatever other ingredients your cake mix calls for.. in my case eggs, water, and vegetable oil 
-Red & Green Food Coloring (I prefer Wilton's brand)
-Optional Red and Green sprinkles or edible flakes
-Candy Canes
-Pillsbury Vanilla Mint frosting

Step One: 
-Make the cake batter according the the directions on the box. 
-When the batter is completely blended and smooth, separate into two bowls o
-Slowly add dye to bowls. Remember, a little bit usually goes a long way so blend completely before deciding if more dye is needed. Also keep in mind that no one wants to bite into a bubble of dye so blend completely... and then blend even more.


Step Two:
-Line your tin with cupcake liners. 
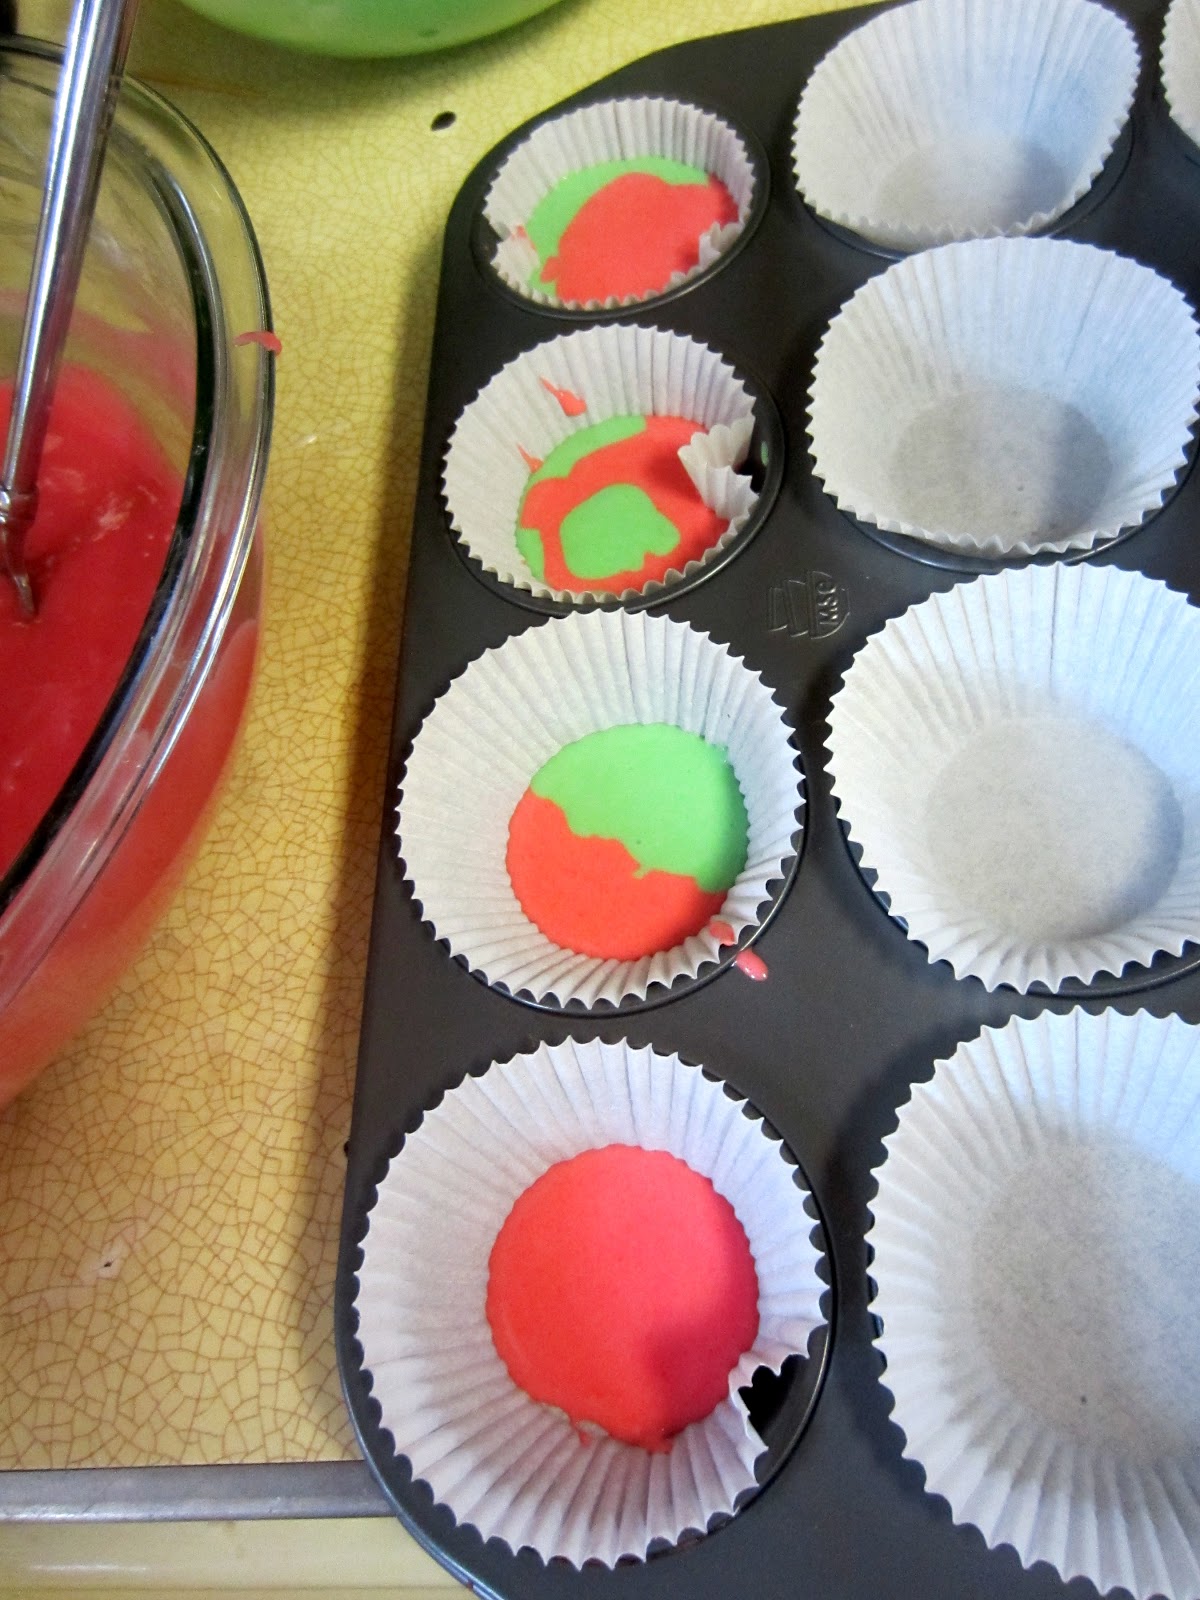
-Layer spoonfuls of the red and green batter in each liner. The smaller the spoonfuls (and the more layers) -the more of a tie dye effect you'll get. 
-Fill liners 3/4 of the way (or whatever the recipe calls for)
-DO NOT try to swirl or mix the different colored batter! This will only make it turn a muddy greyish/ brown. LAYERING ONLY!!

Here you can see the layering progression: the bottom liner only has one layer with the top having four.


All Done!


-Step Three:
-Bake for as long as the recipe on the box calls for!
-Remember you added an ingredient (the dye) so a little extra baking time may be needed! Just be careful and keep an eye on your cupcakes!


Step Four:

-Decorate!
-After your cupcakes have cooled, ice them! I dirty- iced these cupcakes with a knife and canned vanilla mint frosting (beware: it is very minty). To top off the cupcakes I used edible red and green sparkle-flakes and crushed candy canes. I found the gingerbread man cupcake wrappers at Joann Fabrics.


Aren't they the sweetest? 


Monday, December 31, 2012

DIY New Years Glitter Pouch Favors


It's almost New Years and for me that means one thing.. it's time for GLITTER! I made these cute little glitter pouches for my friends to throw up when the clock strikes midnight!

Supplies:
-Glitter, Confetti, Sequins
-Glitter Paper
-Hole Punch or Pattern Punch
-Mini Bags
-Decorative Paper
-Stapler & Staples
 -Marker


Step One:
-Pour all matching glitter/ sequins/ confetti into a bag and shake!
-Optionally you can make your own confetti by punching holes (or other shapes) from glitter paper!


Step Two:
-Separate glitter mixture into little baggies (a small amount will do fine)


Step Three:
-Write out a little poem or design and staple it to the top of the baggies. 
-I wrote on mine: 
"The Clock Strikes 12
Everyone Cheers
Now throw your glitter-
Happy New Years!"


Now pass out and enjoy! Happy New Years everyone!!


Sunday, December 30, 2012

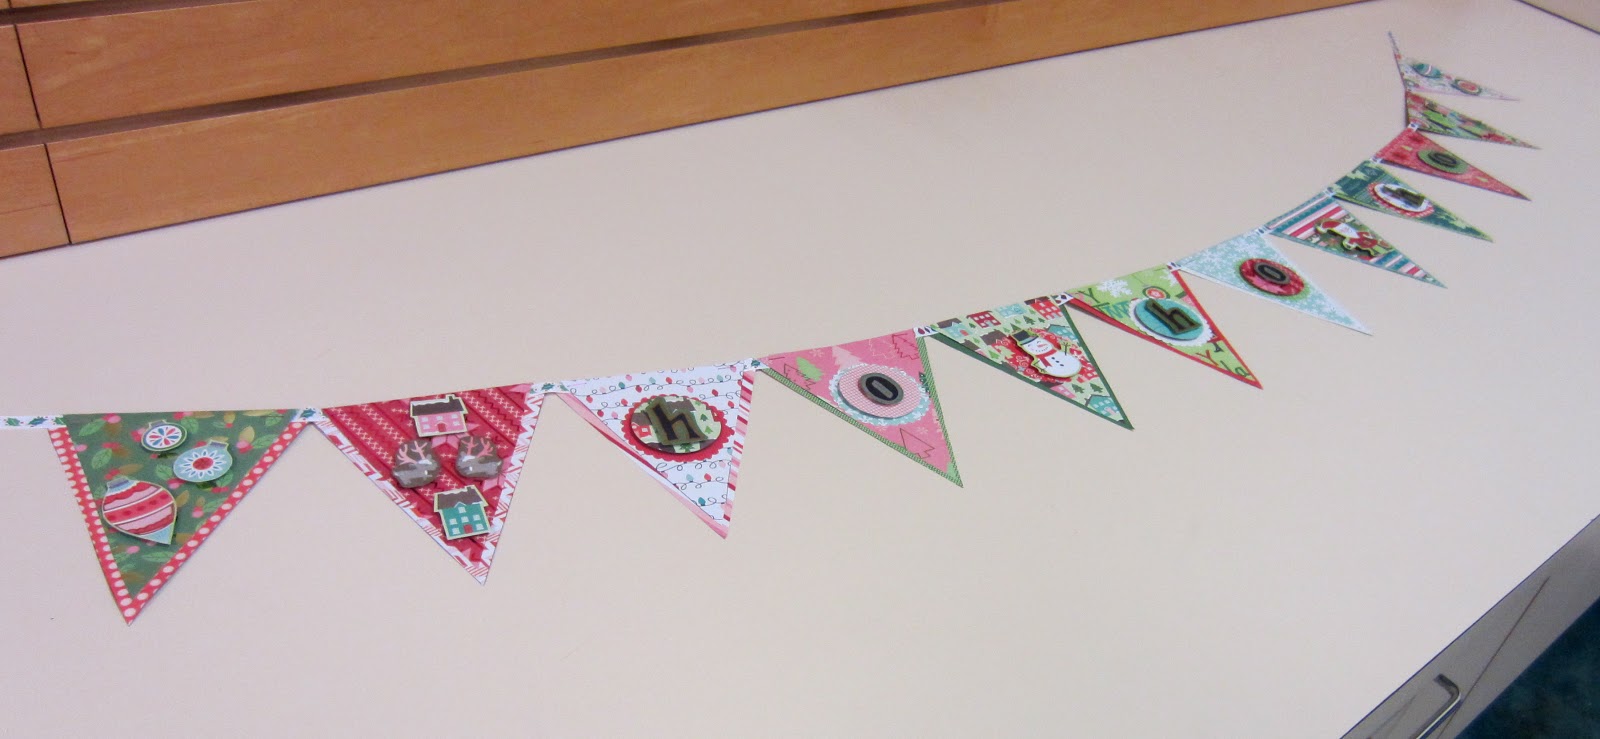
DIY Holiday Bunting Flags


Who doesn't love a good bunting flag? They can be used for any occasion- baby shower, birthday, wedding, and in this case- Christmas!

Supplies:
-Large (12x12) Double-sided scrapbook paper (trust me, it's a lot easier to use)
-Ribbon
-Paper Glue or Rubber Cement
-Stapler & Staples
-Dimensional dot stickers
-Ruler
-Scissors (Regular, and scalloped)
-Scrap Paper (to make pattern)
-Optional stickers/ letters/ decorations

Step One:
-Make your pattern!
-The first triangle should be 5" across the base and meet at a point 6" from the center (2.5") of the base. The picture is much easier to understand:

-Then you need the larger triangle which has a base of 5.5" and extends 6.25" from the center of the base .

-Cut the triangles out and align them so that the bases are touching and the smaller triangle is centered to the bigger triangle. Tape together. (Note: if you are not using double sided paper, keep the triangles separate and use one for each pattern)


Step Two:
-Create your flags!
-Trace the pattern onto the double-sided paper and cut it out!

-Now fold where the triangles meet (the points should not touch, you want to create a border)


-Repeat this step until you have as many flags as you want for your banner- my "ho ho ho" banner needed 12 flags. 

Step Three:
-Figure out the order you would like the flags to go in.
-Take your ribbon and place it between the two sides of the flag (underneath the fold)
(Note: if you used one-sided paper try putting tape between the two triangles at the base to mimic a fold)
-Staple the flag to the ribbon (I used one staple in each corner)
-Continue to staple all of the flags in a row along the ribbon, do not allow for any space between the flags but also be careful not to overlap them. 
-Once flags are stapled, glue the smaller triangle to the larger so that it doesn't flap up. 

Step Four: 
-Decorate your flags. 
-For the "ho ho ho" flags I used scalloped scissors to make a bordering circle, then a normal smooth circle, and then I hand-drew the letters (you can use sticker letters if you like). I layered them using dimensional sticker dots. 


-I used designs from the left over paper to fill in the extra flags 


When you're all finished- hang your banner! They look great over a mantlepiece!