Monday, December 31, 2012

DIY New Years Glitter Pouch Favors


It's almost New Years and for me that means one thing.. it's time for GLITTER! I made these cute little glitter pouches for my friends to throw up when the clock strikes midnight!

Supplies:
-Glitter, Confetti, Sequins
-Glitter Paper
-Hole Punch or Pattern Punch
-Mini Bags
-Decorative Paper
-Stapler & Staples
 -Marker


Step One:
-Pour all matching glitter/ sequins/ confetti into a bag and shake!
-Optionally you can make your own confetti by punching holes (or other shapes) from glitter paper!


Step Two:
-Separate glitter mixture into little baggies (a small amount will do fine)


Step Three:
-Write out a little poem or design and staple it to the top of the baggies. 
-I wrote on mine: 
"The Clock Strikes 12
Everyone Cheers
Now throw your glitter-
Happy New Years!"


Now pass out and enjoy! Happy New Years everyone!!


DIY Glitter Heels


I saw a tutorial for DIY glitter heels a while ago on Pinterest.. and I loved the idea, but the process involved layers and layers of Mod Podge and TONS of loose glitter. Now, I love Mod Podge but it takes forever to dry and gets all sticky and I really don't think I have the patience to do an entire pair of shoes. So I found an easier way!


Supplies:
-An old pair of heels (mine are from Target)
-A can of Krylon Glitter Spray in a SIMILAR color to your shoes (it's much easier to make the shoes look)
-Krylon Glitter sealant

Step One:
-Prepare!
-Make sure there isn't any dirt on your shoes
-Lay down newspaper in a well ventilated area- the glitter will get everywhere.


Step Two: 
-Spray Shoes with glitter. Seriously it's that simple.. put your hand inside the shoe and evenly spray the shoe while steadily turning it.
-Let the shoes dry, assess how glittery the shoes are, add another coat of glitter if desired (check for missed spots too).


Step Three:
-Spray shoes with Krylon Glitter sealant for protection and voila!

There's no place like home!


Sunday, December 30, 2012

DIY Holiday Bunting Flags


Who doesn't love a good bunting flag? They can be used for any occasion- baby shower, birthday, wedding, and in this case- Christmas!

Supplies:
-Large (12x12) Double-sided scrapbook paper (trust me, it's a lot easier to use)
-Ribbon
-Paper Glue or Rubber Cement
-Stapler & Staples
-Dimensional dot stickers
-Ruler
-Scissors (Regular, and scalloped)
-Scrap Paper (to make pattern)
-Optional stickers/ letters/ decorations

Step One:
-Make your pattern!
-The first triangle should be 5" across the base and meet at a point 6" from the center (2.5") of the base. The picture is much easier to understand:

-Then you need the larger triangle which has a base of 5.5" and extends 6.25" from the center of the base .

-Cut the triangles out and align them so that the bases are touching and the smaller triangle is centered to the bigger triangle. Tape together. (Note: if you are not using double sided paper, keep the triangles separate and use one for each pattern)


Step Two:
-Create your flags!
-Trace the pattern onto the double-sided paper and cut it out!

-Now fold where the triangles meet (the points should not touch, you want to create a border)


-Repeat this step until you have as many flags as you want for your banner- my "ho ho ho" banner needed 12 flags. 

Step Three:
-Figure out the order you would like the flags to go in.
-Take your ribbon and place it between the two sides of the flag (underneath the fold)
(Note: if you used one-sided paper try putting tape between the two triangles at the base to mimic a fold)
-Staple the flag to the ribbon (I used one staple in each corner)
-Continue to staple all of the flags in a row along the ribbon, do not allow for any space between the flags but also be careful not to overlap them. 
-Once flags are stapled, glue the smaller triangle to the larger so that it doesn't flap up. 

Step Four: 
-Decorate your flags. 
-For the "ho ho ho" flags I used scalloped scissors to make a bordering circle, then a normal smooth circle, and then I hand-drew the letters (you can use sticker letters if you like). I layered them using dimensional sticker dots. 


-I used designs from the left over paper to fill in the extra flags 


When you're all finished- hang your banner! They look great over a mantlepiece!


DIY Recycled Mini Candles


I can't tell you how many times I've thrown away a jar candle that still had a ton of wax in it. Once the wick is gone there's really nothing you can do with it and it just seems like such a waste! This year for Christmas I decided to repurpose some of my old holiday candles- but these would make a lovely little present any time of the year!

Supplies:
-Waxed candle wicks with a base (try any craft store)
-Glass baby food jars or glass shot glasses (no plastic!!) - I especially love the baby food jars because I think they look like miniature Yankee Candles.
-Old candles you want to recycle (preferably with scents that will smell nice together)
-Hot glue gun & glue (optional)
-A double boiler/ Oven & pot/ Electric kettle and bowl.. a way to melt the wax
-Decorations (stickers, buttons, ribbon etc)


Step One:
-Make sure your candle holder is CLEAN.. really important especially if you used baby food jars. Goo-Gone does the trick for removing the label.
-Using either a hot glue gone or a little melted wax, secure the bottom of the wick to the bottom of the jar. (I just used a dab of wax)


Step Two:
-Melt the wax you wish to recycle -pretty much any way you want to double boil it. I used my electric kettle to boil up some water, poured it in a bowl, and then placed the candle in the bowl. The candle will float, but still be careful not to get any of the water in the wax. It melted very quickly and evenly.  Just be careful- when glass become too hot it shatters!!

Step Three:
-Using an oven-mitt to handle the candle (the glass will be SUPER hot)- pour the wax into the baby food jars/ shot glasses... be careful not to pour wax on top of the wick! Fill to desired height.


Step Four:
-Wait for previous layer to dry
-Repeat with as many candles as you like, making a striped motif of wonderful colors and scents!
-Make sure to leave room at the top (you don't want an overflowing jar) and trim the wick before lighting!


Step Five:
-Decorate! Remember baby food jars have lids too :)


Monday, December 3, 2012

Headphone Jack Dust Plug


Want an adorable way to decorate your phone, mp3 player, or tablet? Try making one of these adorable  dust plugs that not only snazz up your device but also protect its headphone jack!

What you need:
- An old pair of headphones, pliers, scissors
-OR-
-Rubber headphone jack plugs (I found mine on etsy: try here)
-Polymer clay (neutral color) & an oven
-Clay working tools
-Optional clay molds (try Martha Stewart)
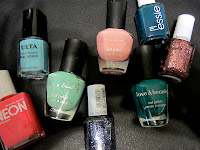
-Nailpolish -OR- Acrylic craft paint & a protective glaze
-Super glue (for use with rubber plugs only)


Step One:
-If you are using an old pair of headphones, use the pliers and scissors to cut out the headphone-jack. You want only the solid metal piece that goes into the jack. If you purchased plugs then you are already ready to go (I purchased my plugs because I wanted to make a lot)

Step Two:
-Make your clay topper. Clay can be kind of hard to work with at first. Warm up clay by rolling it in your hands for a few minutes. This will make it much more malleable and easy to work with.
-To make these bows I used a Martha Stuart mold. To use a mold press the clay firmly into the mold. Watch out for folds or bubbles in the clay. Remove excess clay around mold and make sure that the back is flat. Remove clay carefully from mold. Cut off any over-flow. If you're free-form sculpting just make sure the bottom of the object is flat so that it sits nicely on your phone.


Step Three:
-If you are using the metal plug from an old pair of headphones- gently push the plug into the center bottom of your clay object. Make sure the clay covers the plug until the part where the plug enters the phone. You want the charm to sit right on top of your phone. Feel free to test this out, just be gentle with the clay part. You may have to remold the clay a little bit after inserting the plug.

-If your are using rubber plugs- Follow the same steps as above but then you must remove the plug carefully(the rubber can't go into the oven). When touching up the charm, make sure not to change the hole made by the plug- you want the plug to fit it snugly.


Step Four:
-Bake the clay according to instructions. It's okay if they burn a little on the outside, we're gonna paint them!
-Try using tinfoil to prop the charms so they don't get any flat edges.
-Let clay cool completely


Step Five:
-Paint & Decorate! I used nail polish to paint mine and then there's no need for a glaze. If you're using acrylic paint you will need to seal the paint- clear nail polish makes an excellent cheap glaze!


Step Six:
-If you used the rubber plugs you will need to glue the plug into the hole. Super glue works great!
-Let glue dry completely before trying in phone- you don't want to accidentally glue the plug in permanently!!


Once the glue dries you can plug them into anything with an earphone jack!!


Package them up and give as a really sweet & unique gift!!


Check out the free-form dust plugs that I made:
- I used the same methods as listed above, but instead of using a mold I just free-handed the designs :)


Tabby Cat Plug:


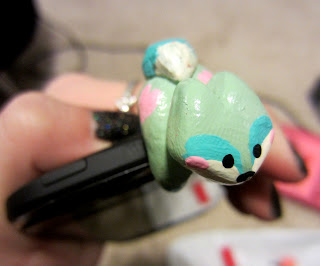
Little Green Fox Dust Plug:


Calico Cat Dust Plug:


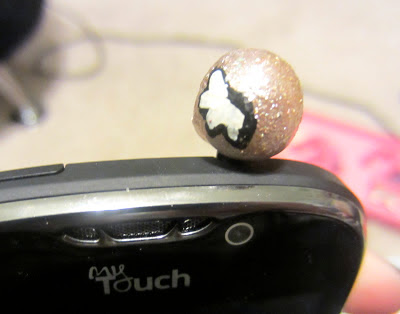
Golden Snitch Dust Plug: 


Various Cupcake Dustplugs:


Wee Purple Owl Dustplug: 


Hope you enjoyed them!